
Build your own website (with Jekyll and Minimal-mistakes theme)
This whole website is built using Jekyll and theme minimal-mistakes. I had no experience of HTML or CSS language, but still managed to get the website to work. That’s just how easy it is to work with Jekyll.
I wouldn’t go through every step of the process in great detail as that would be too much text. But I’ll refer you to corresponding documents which will likely guide you through each of them.
Other resource:
- Learning about Github Pages: Github hosting
Step 1: install Jekyll and minimal-mistakes theme and generate template website
install Jekyll
Type in terminal gem install jekyll for installation.
This should work fine when you have all the dependencies installed. If you run into any issue, go to page jekyll install.
install minimal-mistakes
It takes a little more work to install the theme.
You need to first generate a jekyll folder: jekyll new anyname. Then a folder named anyname is going to be created in your current directory, and it contains all the basic files to make a website.
Then follow the steps described in install minimal-mistakes. It basically involves adding some lines to some files in anyname, or replacing a file with their version on Github, and removing some files.
After you run bundle install, all the dependencies of minimal-mistakes should be successfully installed.
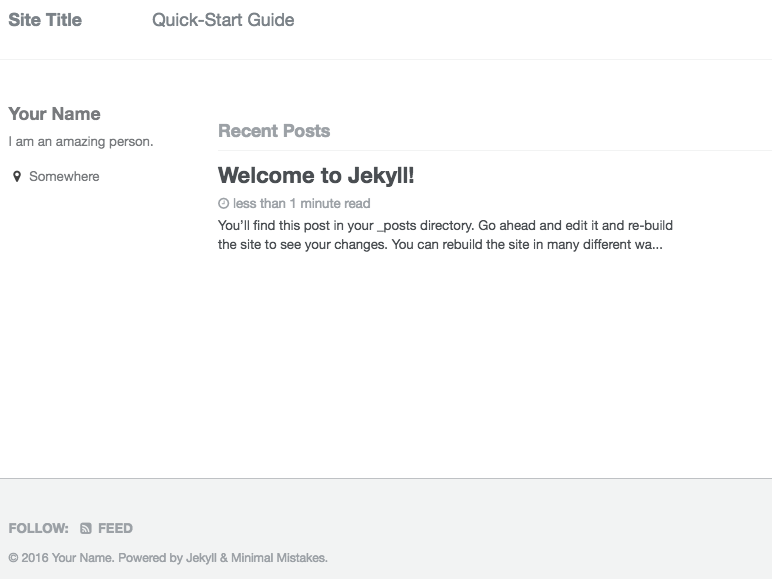
Type bundle exec jekyll serve, and then a template website will be locally hosted at localhost:4000/.
It should look something like this:
Now there are a lot of stuff you can do.
Like setting up site title on topleft corner, changing author name, biography, adding social sharings etc. You can find corresponding fields of all of these in _config.yml (refer to configuration).
Step 2: add pages
Website pages are specified in file _data/navigation.yml:
main:
  - title: "Quick-Start Guide"
    url: /docs/quick-start-guide/
  - title: "Posts"
    url: /year-archive/
  - title: "Categories"
    url: /categories/
  - title: "Tags"
    url: /tags/
  - title: "Pages"
    url: /page-archive/
  - title: "Collections"
    url: /collection-archive/
  - title: "External Link"
    url: https://google.com
Each - corresponds to one page tab:
titleis the page titleurlis the link to the file that contains contents of the page
For example if you want to add a new tab Blogs, you can add the following two lines to navigation.yml:
	- title: "Blogs"
	  url: /Blogs/
Then you make a new directory /_pages/, create inside a markdown file blogs.md containing:
---
title:  "Blogs"
layout: archive
permalink: /Blogs/
author_profile: true
comments: true
---

This is my blog page.
Be sure the permalink: matches the url in navigation.yml file.
Generate the website again, and look what’s new:
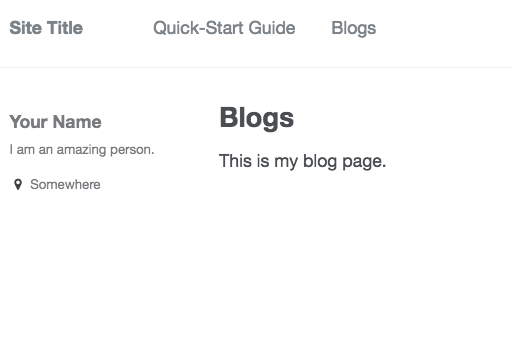
That’s basically how a new webpage tab is added.
Step 3: add posts
Right now your Blog page is just a single page. Next, we are going to add posts to this page.
Posts
Posts should be kept in _posts folder and named after YEAR-MONTH-DAY-filename.md so that minimal-mistakes can correctly identify them.
An example post markdown file:
---
layout: single
title:  "My first post"
date:   2016-11-11
---

my first post looks just fine
where layout:single specifies this is a single page post; title would appear on top of page; date keeps time of “latest update”, and could be used to sort your post. There are also a bunch of other parameters you can specify: other parameters.
Let’s create this toy post toy.md and put it in _posts.
Modify page file to include posts
In order to put top.md on you Blog page, you need to add commands in blogs.md to manually include it.
There are many ways to do this. I’ll just give one example:
open the previous blogs.md file and add the following lines:

This is basically Liquid language. You can adapt this block of code to get different display: sort by year, month or category etc.
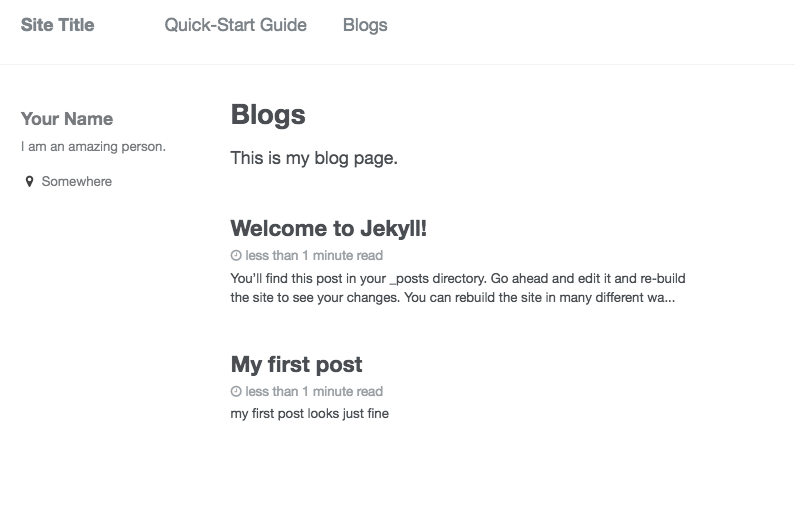
Rename toy.md with prefix YEAR-MONTH-DAY. Then you can see the it on Blog page:
Step 4: use Github for hosting
Github pages is a great choice for free hosting. If you create a github repository named username.github.io, it will automatically convert the contents to a webpage at address username.github.io. However to make this work, it takes more than just uploading all the related local files to the repository.
The safest way is to copy the repository of minimal mistakes, and replace some files with your own version. Steps as below:
- Copy minmal mistakes:
# create a new folder for this online version website
mkdir GitPage
cd GitPage

# initiate git repository
git init

# add minimal-mistakes repository to your remote
git remote add minimal "https://github.com/mmistakes/minimal-mistakes"
# clone the repository to your folder
git pull minimal master
-
Customize the files:
After you pull all the stuff, you get a version of minimal mistakes website on your computer. We want to keep the framework, remove the contents and put our stuff in.- You can safely delete folders
/docsand/test. - replace
/_data/navigation.yml,/_data/ui-text.ymland/_config.ymlwith your own version. - move your
_pagesand_postsfolder to here
- You can safely delete folders
-
Push your customized version online: Create the
username.github.iorepository as mensioned previously.
# add your github repository to remote
git remote add origin "ADDRESS.OF.YOUR.GITHUB.REPOSITORY"

# track all files in GitPage folder and stage a commit
git add .
git commit -a -m "first commit"

# push the folder online
git push origin master
If every step goes well, your personal website should be alive at “username.github.io”!

Step 5: customize website style (to be updated)
Now the website is up and running, everything’s great. However, if you are eager to modify the website style to better fit your taste, it’s gonna cost a little more work.
Leave a Comment